Finally managed to get the troops into action last week. I assumed the role of General Reynier for this one, and my father gamely assumed the guise of the General der Kavallerie Erbprinz von Hessen-Homburg (below).
Below is a quick update on the progress of Udom I's Russian 2nd Guard Infantry Division, the balance of which was present but never went into action. Foreground are the two battalions of the Lieb Garde Regiment. Also completed in time to participate was the 1/Semenovski Regiment. (As I have enough for 6 more battalions, I have elected to do the Preobrejanski and Semenovski Regiments from the 1st Guard Division and merge the two brigade under Udom I for now.
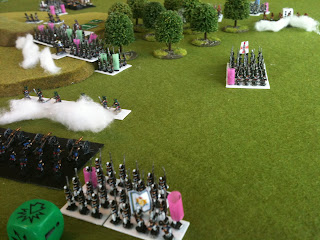
Below is a shot taken at what might have been the height of the fighting, the 3rd and 4th hours, as the Coalition attacks reached their high-water marks and the Franco-Allied divisions countered hard to decisively drive them back. In the bottom right hand corner can be seen the Prussian Dragoons, routed attacking a square in the 1st hour, and a Regiment of Austrian Cuirassiers, broken by flanking artillery fire. Nearby, the Russian reserves stand in columns. At the very top of the picture can be seen all three battalions of the 6th Ligne, and 1 battalion of the 14th Polish Line. The Austrians are pressing hard at the hill on the left, and the Prussians and Saxons are locked in combat over the heights in the centre.
The Saxons reorganise whilst skirmishers keep the Prussians occupied on the far side of the crest.
Gerard moves his one battery (of 12pdrs) into the centre.
Where it proceeds to mow down the attacking Austrians time and time again, before running out of ammunition and being withdrawn from the line of battle to replenish.
Nevertheless, the Austrians manage to overrun the positions of the 1/12th Line Regiment. This Austrian battalion would occupy that ground for almost an hour before being swept away by the Saxon Garde du Corps before it could form square.
Lessing's brigade moves up past General Reynier in preparation to counter-attack in support of Gerard's hard-pressed division. The Zastrow Cuirassiers didn't get into action before the battle ended.
The two regiments double-out, although they had to attack one behind the other due to a lack of available ground to employ the brigade in line abreast.
At the same time, Gerard leads three Polish battalions forward in a fierce attack that shatters the Hungarian Regiment, and in combination with the attack of the heavy cavalry, seals the fate of Liechtenstein's Division of Austrians.
The Prussian attack never fully develops, being checked at the crest of the central heights, and stymied by fierce resistance in the copse to the left. Both sides inflict heavy losses on each other nevertheless.
With the Prussian momentum stalled, and the threat of the marauding Allied cavalry to the flank removed by the retreat of the Austrian Cuirassiers and Russian Hussars, the Saxons go forwards all along the line. the Fus and 2/7th Reserve Regiment break, as does the 2/1st West Prussian, despite the very low chance of the 1/Anton prevailing against them.
Indeed, the 1/Anton goes 'battle mad' and breaks through the Prussian line, but it's line of attack carries it past the battery (un)fortunately. The 2/Anton is not so lucky, and is routed by the 1/1st West Prussian.
Despite the repulse of all the infantry attacks, the Allied Light Cavalry puts up a good showing (the Russians that is). The Prussian Dragoons rally to follow in their wake late in the day, as the Russian Grodno Hussars break the Saxon Hussars and Polish Chasseurs. Pictured: having just carried away a Saxon FAB, the Hussars get 13" of breakthrough movement, which Hessen-Homburg took in full (with a shrugged "why not"). The massed battalion squares of the 24th Division repelled the Russian horsemen, ending their wildly successful charge, but inflicting no losses.
The aftermath of the carnage around the French right flank, after the successful attack of the Saxon Heavy Cavalry Brigade. Gerard's command comprised 4,300 French and 2,000 Polish infantry, and one 12pdr FAB. It suffered 1,200 French and 480 Polish losses, against 1,740 Austrian (from 7,000 men).
All in all, a thoroughly enjoyable game, and not at all a foregone conclusion at any stage, as indicated by the heavy losses to both commands. Allied losses were only higher due to the last, determined attempt by the Austrians to carry the Franco-Polish positions.
French = 20,000 deployed, 14,500 engaged.
2,940 losses, with 1 gun. A further 6 guns carried off by the Russian Hussars.
Allied = 22,500 deployed, 17,500 engaged.
3,360 losses, with 1 gun. A further 12 guns captured when the Austrian Line Division fled and the gunners abandoned the two Brigade Batteries.


