With a little bit of time on my hands, I had the treat of an opportunity to play Carnage & Glory II, my preferred rule set. Accordingly I threw together some not particularly historical OBs for an 1809 clash between two small French and Austrian forces. The Austrians were tasked with defending, loosely centred around the two pieces of high ground that flanked an imaginary road running across the field. The French were to drive the Austrians off and capture those features.
French OB:
GdD Division Boudet, 1 x 12pdr FAB, 1 x 6pdr FAB
GdB Fririon, 2 x Legere Battalions, 3 x Ligne Battalions
GdB Valory, 5 x Ligne Battalions
GdD Marulaz, 1 x 6pdr HAB
GdB Pire, 8e Hussars, 16e Chasseurs
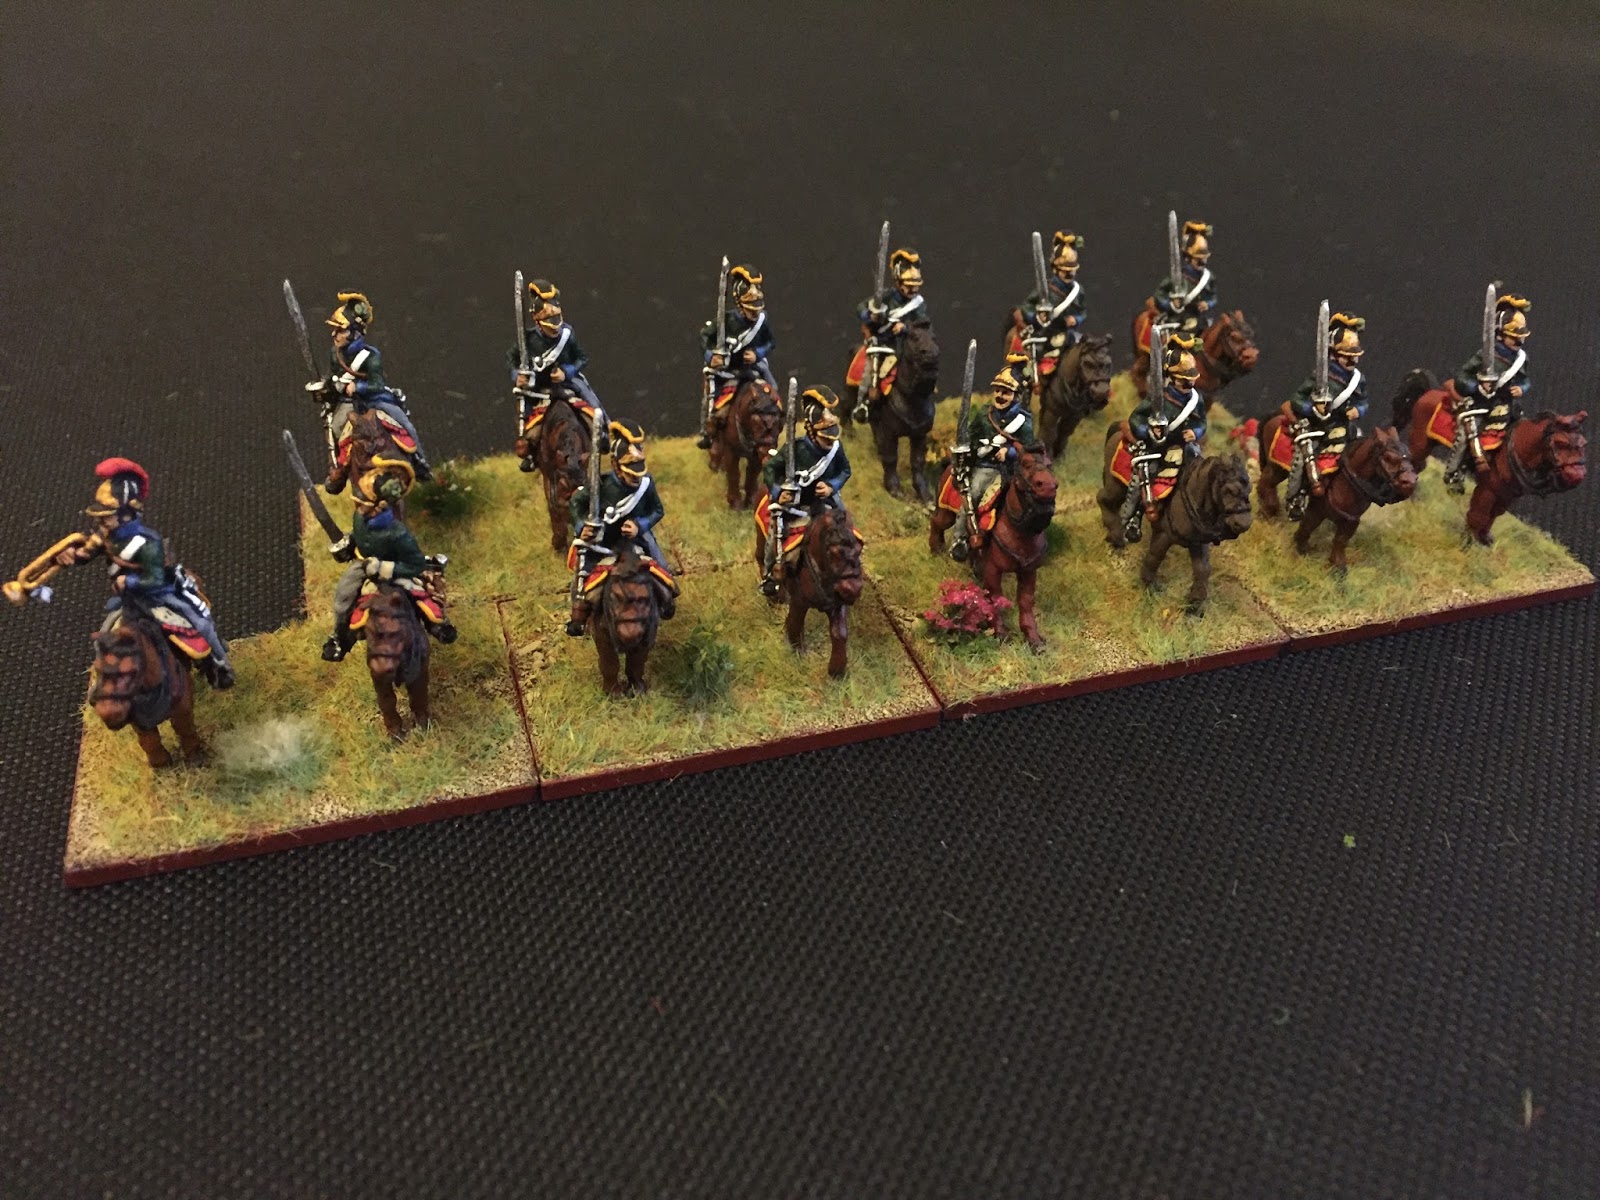
GdB Doumerc, 2e & 9e Cuirassiers
Totals = 7,000 Infantry, 2,500 Cavalry, 22 Guns
Austrian OB:
FML Rohan, 12pdr Position
GM Swinburne, Freikorp Hussars, 1 x Grenz, 1 x Landwehr, 2 x Hungarian Battalions
GM Riese, 5 x German Battalions, 6pdr Brigade
GM Newshadter, 1 x Jaeger, 2 x German Battalions, 1 x Brigade
GM Rottermund, 1 x Dragoon, 1 x Chevauleger
Totals = 8,000 Infantry, 1,500 Cavalry, 22 Guns

The starting positions. Austrian Light Cavalry screen one flank, the Mixed Brigade the other, with guns massed astride the 'road'. French deployment much simpler, with Light Cavalry matching up against their counterparts. The Cuirassier Brigade, would not arrive for half an hour.

Fririon's Brigade on the French right, including the 1er and 2e Battalions of the 3e Legere.

Skirmishers from Fririon's Legere Regiment engage Grenz and Freikorps in the rough ground as 2e/3e Legere shake out into open order to screen the advance.

Opposite the Austrian right, Artillerie a Cheval rushed forward to engage the Austrian cavalry.

Nr 1 Jaeger Bn occupies the woods ahead of the main Austrian line and throws out skirmishers. They would go onto hold this position for the duration.

The Wallachisch Illyrian Grenz Nr 13 and Hiller Infantry Regiment push up in line to defend the Austrian left flank.
First real shots in anger! Austrian Brigade Batteries greeting the advancing French columns.

An early attempt to disrupt the French attack, the Carneville Freikorps Hussars charge the 1er/3e Legere, who having already formed into close column cooly manoeuvre into square.

The veteran French light infantry mauls the brave but small (120) band of Hussars.

But GM Swinburne steadies the survivors and orders them to retire!

On the French left, Doumerc's Cuirassiers have arrived and are summoned by GdD Marulaz to reinforce his Light Cavalry. The French commanders plan to drive in the Austrians with weight of numbers and superiority of arms.

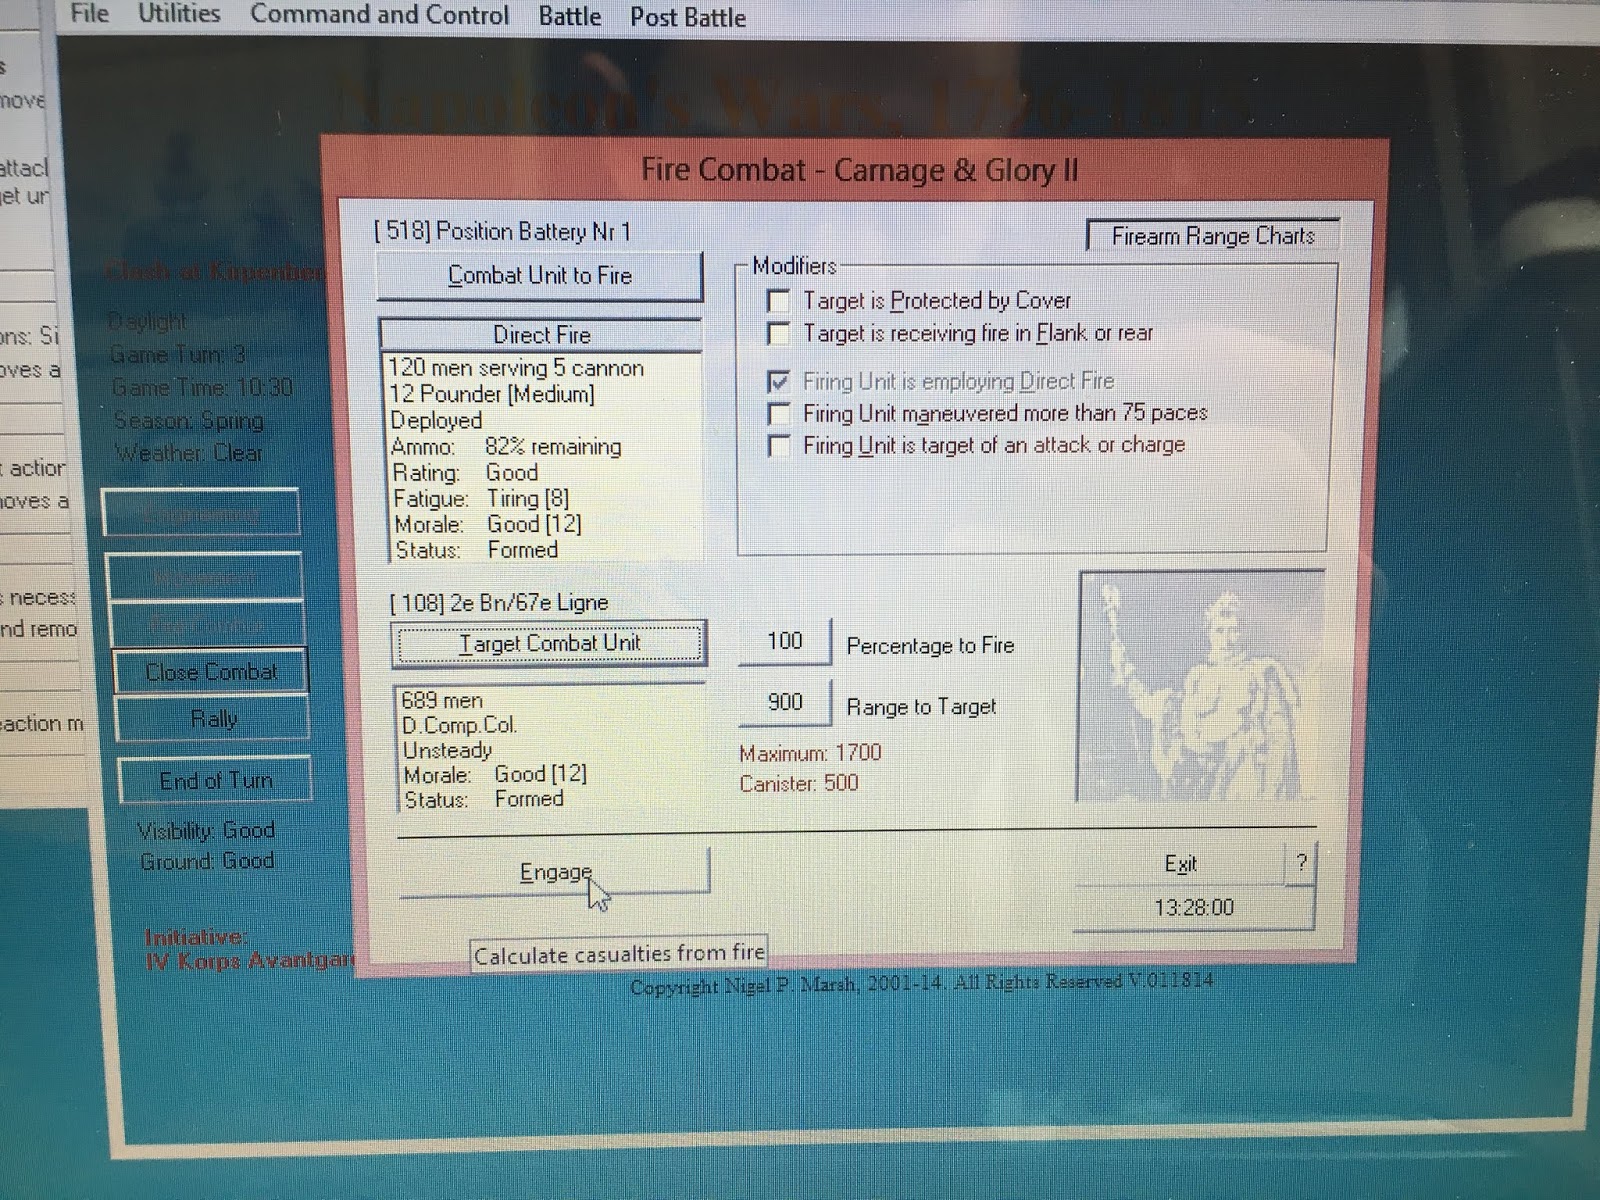
Fririon's Brigade engaged on the right, with the divisional batteries now returning fire against the Austrian guns. This would prove effective, as despite causing few casualties, the Austrian gunners fatigue spiked dramatically by being under fire whilst they were already tiring from engaging the French infantry as fast as possible. One of the regiments from Valory's Brigade moves up in the centre to keep the line intact.

After driving in the sparse Austrian skirmish line, French skirmishers then pepper the waiting Austrian lines, causing enough discomfort over half an hour for the balance of Fririon's Brigade to move up and assault the Grenz and Hungarians.

The attack goes in at close quarters. Both defending Austrian battalions would be thrown back, and never able to halt the French impetus, being progressively forced to retire and then disperse under pressure. However on the right of the shot, the 1er/3e Legere meets severe resistance in the form of the Mahr Freiwilliger Battalion...

The Hungarians fall back in disarray.

But despite being armed with second rate weapons, the Austrian volunteers inflict terrible losses on the Legere! The French cannot muster the same in reply and are now caught unable to deploy into line.

In the first 15 minutes Fririon, accompanying the 1er/3e Legere, is unhorsed by Austrian musketry.

The Austrian volunteers continue to enthusiastically blaze away into the beleaguered French battalion, causing severe losses.

And within half an hour of this, GdB Fririon is carried from the field, shortly followed by the 1er/3e Legere routing. Despite the efforts of the regimental commander to rally them they would disperse from the field.

The 1er & 2e/93e Ligne are ordered to clear the Jaegers from the woods, accompanied by GdB Valory himself. However the Austrian lights would prove more than a match for the French skirmishers, and an attempt to close toils through the trees and is then repulsed with a sharp volley (60 casualties), sending the two battalions back to their start point where they would remain, attempting to recover their fatigue whilst constantly harassed by rifle fire. Even the added attention of GdD Boudet would not be enough to reorder them before the end of the battle.

Meanwhile on the French left after bombarding the Austrian cavalry the French take the initiative and charge their opponents.

French commanders leading from the front!

The Austrians are caught on the hop, and their paltry defensive fire achieves nothing. The Riesch Dragoons retired before contact, and over half an hour would be repeatedly chased back, suffering steady losses. The Vincent Chevaulegers received the same treatment and were bundled back by the attacking Chasseurs.

Within a very short time the whole of GM Rottermund's Brigade is on the rocks, and disperses en masse under suffocating pressure from the French!

The Rally Phase showing evidence of the busy turn! As the game went on there weren't enough leaders on either side to shore up all the units that needed a few words of comfort.

The Austrian left deteriorates. The Grenz are about to disperse, and one of the two Hungarian battalions has just retired from the field on their right. However, Fririon's Brigade has been creaking under the effort of continuing the attack and has reached its high water mark.

Compounding things, the Austrian right has been turned by the loss of Rottermund's Brigade. Whilst Pire rallies his brigade, Doumerc now moves his Cuirassiers to try and exploit the situation, with the strong possibility of rolling up the Austrian line!

Two battalions of Newshadter's Brigade have other ideas however, and the waiting squares unleash close range volleys against the charging French heavies!

The 2e Cuirassiers attempt to charge home first...

But are conclusively halted by the determined Austrian infantry.

Courageously leading from the front, Doumerc is unhorsed but survives amidst the confusion of of musketry and swerving horses.

The 9e Cuirassiers fare no better, suffering heavily and despite the encouragement of the divisional command, Marulaz.

Who pays for his valour with his life, receiving an Austrian musket ball for his troubles.

The overall situation at the end of two and half hours of fighting. An end was called with the Austrians being turned on both flanks and with their morale plunging. Valory's fresh regiment had moved up in the centre to threaten the weary Austrian guns, although the whole of Boudet's division was by this time suffering from such fatigue and disorder that it was unable to advance.

The compromised Austrian left.

The centre. Valory had brought up his fresh regiment, the divisional reserve, to menace the exhausted Austrians and outflank the Jaegers in the woods. In fact although these battalions were fresh, the command integrity of the brigade was low enough and overall fatigue so high that it was in no position to sustain an immediate renewal of the attack.

The right flank. Bloodied French Cuirassiers take stock and attempt to reform as the division reels from the loss of its commander. The Artillerie a Cheval had in the meantime moved up into a prime position to savage the Austrian squares or throw point blank canister into the woods to try and clear out the Jaegers.

Fair to say that the French cavalry had a mixed performance this day!
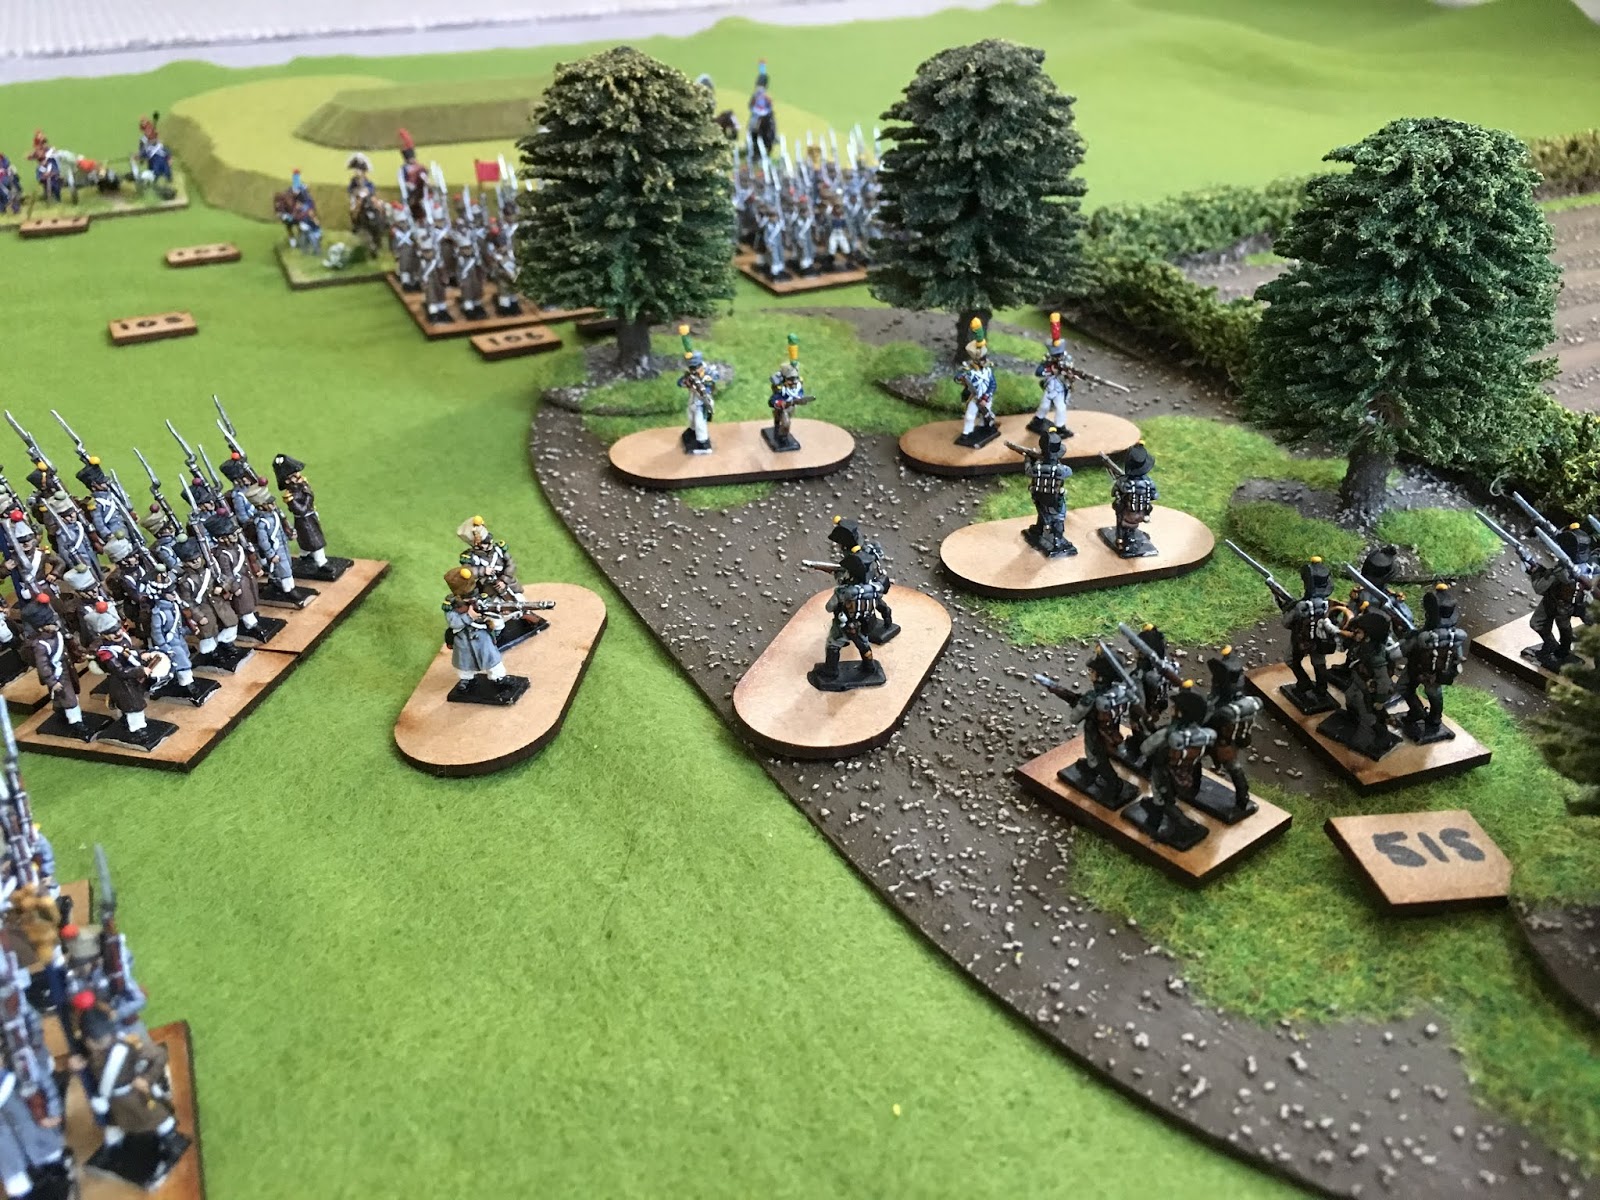
Without doubt the MVPs of the engagement were the Jaegers, who held on with aplomb, despite starting with only 550 effectives, they drove off and kept at bay the 93e Line (1,450 strong), and were only forced to evacuate their position by the situation along the rest of the Austrian line, and with both their flanks turned.

The butcher's bill. Sadly I accidentally clicked on a stage too far and was unable to see the breakdown of losses at the 'current' stage before pressing end battle to process final results. On top of this it meant I could not capture all the lovely granular data from the OBs showing individual unit status and losses! It's the kind of thing I like to read, so very frustrating.

The stats here don't quite tell the whole story, the Austrian loss of 94% of their cavalry included a huge number of missing from that brigade, as from memory they lost around 120 to combat and artillery and twenty prisoners before being dispersed en masse.
An extremely fun game and confirms C&G as my favourite rules for the period. It might not come across but a French victory was not always on the cards, they lost the initiative after an hour due to soaring levels of fatigue, and were fortunate to wrest it back again 45 minutes later, as they took the risk of pushing on hard. It paid off, as heavy Austrian losses caused their morale to dive, just in time to secure victory because the French infantry was grinding to a halt from the effort. However things might have been different if the Austrian cavalry had put in a better showing, after all the Jaegers and Landwehr showed what could be achieved - the former repelling two battalions (albeit they were struggling with the terrain), and the latter absolutely smashing the Legere with close range musketry. Time was called as the Austrian position in the centre was essentially compromised despite having several uncommitted battalions and the French would likely have rested and reorganised for a period whilst employing artillery and skirmishers against the remaining defenders. The position would definitely have been cleared and the Austrians running the risk of being slaughtered by the waiting French cavalry.
Anyway, I hope you enjoyed this little insight into Carnage & Glory, putting the screenshots was a deliberate act to show the system in action and the flavour that is injected into the various results and messages. I can't recommend it enough. Vive l'Empereur!